TOP264KG Pinout: eSOP-12B Pin Functions & Design Guide
TOP264KG Pinout: eSOP-12B Pin Functions & Design Guide
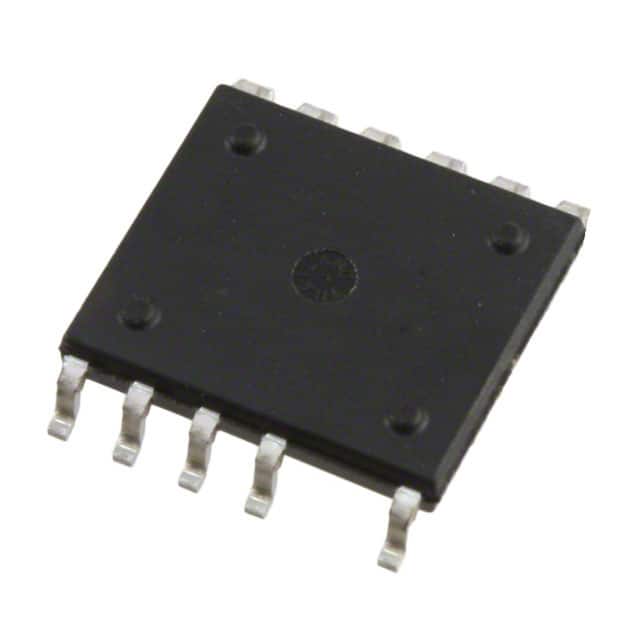
The TOP264KG-TL comes in Power Integrations' eSOP-12B package - 11 pins plus an exposed thermal pad. On paper it looks like a lot of pins, but there are really only 6 functional signals.
Eight of the pins are DRAIN (tied together internally), two are SOURCE (tied together), and the remaining pins - C, V, X, F - are the ones you actually design around. The rest is heatsinking.
This page covers what each pin does, how to connect it, and the mistakes we see most often in prototype bring-up. The pin numbers follow the eSOP-12B footprint (JEDEC standard).
Package Overview: eSOP-12B
The eSOP-12B is a 12-lead exposed-pad SOP. Pins 1-6 on one side, 7-12 on the other.
The exposed pad is the IC's primary thermal path - connected to SOURCE internally. It must be soldered to a copper pour on the PCB for any design above 15W. Skip this and the junction hits thermal shutdown within seconds at full load.
Pin Function Table
| Pin | Name | Type | Function | Typical Connection |
|---|---|---|---|---|
| 1-4 | SOURCE (S) | Power | Power ground return. Also the internal controller reference - CONTROL, LINE-SENSE, and EXTERNAL CURRENT LIMIT are all referenced to this pin. | Connect to the negative side of the input DC bus through a low-impedance Kelvin path. Do not share with noisy switching current loops. |
| 5 | FREQUENCY (F) | Input | Selects switching frequency. Pull to SOURCE = 132kHz. Pull to CONTROL = 66kHz. Read once at startup, then latched. | Connect to SOURCE for full-frequency (smaller transformer, default setting). Connect to CONTROL for half-frequency (lower EMI, better efficiency at light load). |
| 6 | VOLTAGE MONITOR (V) | Input | Line overvoltage/undervoltage, line feed-forward, and remote ON/OFF. Also sets overvoltage protection threshold at 725V on the DRAIN. | Resistor divider from the rectified DC bus to V pin, with a 4.7-47µF bypass cap to SOURCE. For low-power designs, this pin can also serve as the primary-side bias supply for an external optocoupler. |
| 7 | EXTERNAL CURRENT LIMIT (X) | Input | Programs the primary current limit. Leave open = 100% of internal ILIM. Connect resistor to SOURCE = reduce ILIM proportionally. Short to SOURCE = 70% of internal ILIM. | Leave open for full power. For designs that need to limit peak primary current (thermal management, smaller core), connect a resistor from X to SOURCE. See the PI datasheet curves for R vs ILIM reduction. |
| 8 | CONTROL (C) | I/O | Feedback input. Sinks a current proportional to the output error signal, which modulates the duty cycle on a cycle-by-cycle basis. Also the bypass supply - internally regulates to 5.85V from the DRAIN during startup. | Connect a 47µF electrolytic (low ESR) from C to SOURCE for bypass. Connect the optocoupler collector to C, emitter to SOURCE. Add a 100nF ceramic in parallel with the 47µF for high-frequency decoupling. |
| 9-12 | DRAIN (D) | Power | MOSFET drain. Switches the transformer primary - peak voltage can reach 2× the rectified DC bus plus the reflected output voltage plus leakage spike. | Connect all DRAIN pins together externally. Use wide copper traces on the same layer as the IC to minimize parasitic inductance. Add an RCD clamp or TVS from DRAIN to the DC bus positive to clamp the leakage spike below 725V. |
Key Design Rules - Pin by Pin
C Pin - CONTROL
The most critical pin on the IC. The C pin does three things at once: it's the feedback input from the secondary-side error amplifier, it's the internal supply rail bootstrap, and it sets the auto-restart timing. Get this wrong and the converter won't regulate - or won't start at all.
- Capacitor: 47µF electrolytic, low ESR, rated 16V minimum. A 47µF MLCC does not work here - the internal compensation loop expects the ESR zero from the electrolytic. If you must use ceramic, add a 0.47Ω series resistor.
- Decoupling: 100nF ceramic in parallel with the electrolytic, placed as close to C and S as physically possible.
- Optocoupler: collector to C, emitter to S. No series resistor needed - the C pin sources a constant current internally.
V Pin - VOLTAGE MONITOR
The V pin is optional - you can leave it floating and the IC defaults to its internal thresholds. But for production designs, connecting it properly prevents line faults from destroying the supply.
- OV/UV thresholds: IV = 25µA (line under-voltage, stops switching), IV = 112µA (line over-voltage, stops switching). Size your input divider to hit these at your desired thresholds.
- Remote ON/OFF: pull IV below 25µA through an external NPN to shut down the IC. Useful for system-level standby control without a secondary-side switch.
X Pin - EXTERNAL CURRENT LIMIT
The X pin programs the primary current limit. Most designs leave it open for 100%. But if you're using a smaller transformer core that saturates at lower peak current, program it down.
F Pin - FREQUENCY
The F pin is read once at power-up and latched internally. You can't change frequency dynamically - the IC samples it during the first few milliseconds after the CONTROL pin charges past 5.85V.
- 132kHz (F = SOURCE): smaller transformer, higher power density, slightly higher switching losses. Use for open-frame supplies where enclosure cooling is available.
- 66kHz (F = CONTROL): larger transformer needed, but lower switching losses, less EMI filtering required, better for sealed adapters with limited airflow.
Common Prototype Mistakes
These are the issues FAEs see most often when customers bring in a first-rev TOP264 board that isn't working.
| Symptom | Likely Cause | Fix |
|---|---|---|
| No startup, VBP stuck at ~4.5V | C pin capacitor is MLCC instead of electrolytic. Internal regulator can't bootstrap because the MLCC's low ESR destabilizes the startup loop. | Replace C-pin cap with 47µF low-ESR electrolytic. Add 0.47Ω in series if you must use ceramic. |
| Regulation loop oscillates at ~2-5kHz | Optocoupler connected in reverse (collector to S, emitter to C). The C pin sources current - it needs the optocoupler transistor collector on C, emitter on S. | Swap the optocoupler connections. Collector to C, emitter to S. Verify with a scope on the C pin - during steady-state regulation it should sit between 4.8V and 5.8V. |
| Unexpected OV shutdown at 180VAC | V-pin divider uses 1% resistors without margin. The IV(OV) threshold has a +/-5% tolerance - at high line with resistor tolerance stacked, the OV trips prematurely. | Increase R for the upper divider arm by 10% from the calculated value. Or add a small capacitor (100pF-1nF) from V to SOURCE to filter line transients. |
| Heats up fast, then auto-restarts | Exposed pad not soldered. At 30W this IC dissipates ~2W - the SO-12B plastic body can't move that heat without the exposed pad connection. | Solder the exposed pad to at least 2.5cm² of 2oz copper on the top layer, stitched to a bottom-layer pour with 6-8 thermal vias. |
| Works at 115VAC, fails at 230VAC | DRAIN voltage exceeds 725V during the leakage spike at high line. RCD clamp values calculated at 115VAC don't provide enough headroom at 230VAC. | Re-calculate the RCD clamp for 230VAC + 20% tolerance. The reflected voltage plus the leakage spike must stay below 680V to leave margin below the 725V MOSFET rating. You need that 45V cushion - Rev B designs that skip this burn DRAIN pins. |
Frequently Asked Questions
Q1: How many DRAIN pins do I actually need to connect?
A: All of them - pins 9-12. Some layouts connect only two DRAIN pins and float the rest, which concentrates the switching current through fewer bond wires and increases parasitic inductance. Connect all four DRAIN pins together on the PCB with a single wide copper pour. The internal bond wires share the current; the external copper needs to match that.
Q2: Can I leave the V pin floating?
A: Yes, you can - but you lose line OV/UV protection. With V floating (or connected to SOURCE through a cap), the IC runs with its internal default thresholds. This is fine for bench testing and low-risk applications. For any design that ships to end users, connect the V pin properly - it's the only thing standing between a line surge and your transformer primary.
Q3: F pin - can I switch frequency on the fly?
A: No. The F pin is read once at startup and latched. If you need dynamic frequency control, TOP264 isn't the right part - look at InnoSwitch or an external controller. For most designs, 132kHz is the right default unless you're EMI-constrained in a sealed enclosure.
Q4: Why does the X pin program ILIM but not the output power directly?
A: Because ILIM sets the primary-side peak current, while output power depends on the transformer turns ratio and secondary-side design. Reducing ILIM reduces the max power the IC can deliver, but the actual output power is set by the feedback loop and the load.
The X pin is a protection feature, not a regulation feature. If you need to limit output power, design the transformer and feedback to do that. Use the X pin to prevent the transformer from saturating - that's what it's for.
Q5: What's the real difference between connecting F to SOURCE vs CONTROL?
A: Transformer size, EMI, and efficiency at light load. 132kHz (F=SOURCE) lets you use a smaller core - the transformer is about 30% smaller by volume - but the switching losses are higher and the conducted EMI starts from a higher fundamental frequency. 66kHz (F=CONTROL) means a larger core but cleaner EMI and slightly better light-load efficiency because you're switching half as often. In practice, adapters sealed in a plastic case usually go 66kHz. Open-frame industrial supplies go 132kHz.
Q6: The C pin voltage is sitting at 6.2V - is that too high?
A: Yes - that's above the normal regulation range. During steady-state operation, CONTROL should sit between 4.8V and 5.85V. At 6.2V the shunt regulator is still active (it clamps at ~6.4V), but the feedback current is saturated - the IC is delivering max duty cycle regardless of the load.
Check that the optocoupler is actually pulling the C pin down when the output reaches regulation. The most common cause: the secondary-side reference (TL431) isn't turning the optocoupler LED on at the right voltage. Rev A boards with wrong TL431 divider ratios land here every time.
Related information



-
LNK304DN-TL Power Integrations
-
LNK304GN-TL Power Integrations
-
LNK304DG-TL Power Integrations
-
TNY277PN Power Integrations
-
TNY276PN Power Integrations
-
TNY278PN Power Integrations
-
TNY278GN-TL Power Integrations
-
TNY280GN-TL Power Integrations
-
TOP266KG-TL Power Integrations
-
TOP258PN Power Integrations
-
TOP253PN Power Integrations
-
TOP253PNAU Power Integrations

- 1500+ Daily average RFQ Volume

- 20,000.000 Standard Product Unit

- 1800+ Worldwide Manufacturers

- 15,000+ In-stock Warehouse